I saw this on pinterest. Why, yes. Yes I can. (*update - oooh - that's a bummer - it's not there anymore. Maybe I should start claiming that I made this up with my very own brain. But... I didn't. Someone made a Christmas card that became my ornament art inspiration. Moving on...)
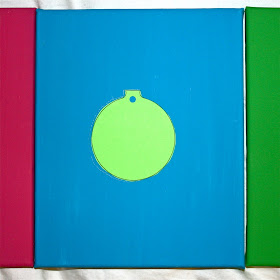
So I cut out some ornament shapes.
I used bauble shapes from my Christmas Ornament Banner Kit (that's why they have the holes). But you can do any shape that makes you happy.
Even with a perfectly symmetrical printed out version of the shapes, I still folded them in half before I cut them. I mean, I am a grown-up and everything, and I've had my share of scissor usage, but I guaran-darn-tee you, if I didn't fold these suckers in half, they would have been really uneven.
I picked up a jumbo pack of ten 8"x10" canvases at Michael's when they were on sale.
I painted three of them - pink, blue, and green. Because those are my Christmas colors! Geez! I also throw lots of red and white into the mix, but for this project, I wanted my colors on the super happy side.
I traced my ornaments.
With pencil. Unevenly. You got something to say? Huh? Do ya?
And then I smothered the entire ornament shape with Tacky Glue. Aleene's in the gold bottle. It's my favorite and I use it in all my craft kits.
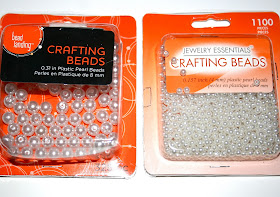
Then I got some beads. After all three ornaments, this is how many beads I still have left. Excellent!
I randomly poured on some of the bigger beads.
And then I added more and more and made a nice even-ish outline around the outside of the ornament.
Then I poured on some of the smaller beads. Some find their home right away. Others sit there at the top, like so:
If you use your finger to make them find their homes, it will just push the bigger ones out to make room. Then your bead outline will get messed up. A mechanical pencil (with no lead showing) worked for me. Go to your home, Bead!
Beads in their homes.
I let it all dry.
I glue gunned some ribbon to the top of the ornament and up around the top of the canvas.
And then I learned how to make The Perfect Bow. Which is an entire craft feat in itself. I asked Google and Google said, No way, man, perfect bows are rough. Oh, wait, you're not five years old? That's embarrassing. You should probably check out this link.
And that's when Martha Stewart showed me the way.
Maybe you have always known how to create The Perfect Bow. Not me. Up until now, when a situation called for a nice looking bow, I would make the only kind I knew how to make. You know. The kind I learned how to make when I was five. For shoelace-tying purposes. Even as a grown-up, if I needed a bow, I would tie that old school one, try to make it look nice, get frustrated, say, "'F' it," and move on with my life.
But now! Now I know! Look at the perfection!
to write some ... wait for it...
WORDS IN THE HOME!
You know that I'm usually against them, but I think, for me, they make holidays more fun. After the holidays, though, watch out!
They mostly come at the holidays...mostly. (Get it? Get it? Word Aliens!)
Sparkly. Merry. Bright. Oh, my.
I want to find some pretty white frames for them, but in the meantime...
Up on my mantel they go.
Happy 'Words In The Home' Season!


Yay!!!!!! I love them SO much, they're gorgeous!!!! Good work sis! Happy "words in the home" season to you! xo
ReplyDeleteBeautiful.... and love the way how u've shown the tutorial step by step.... heart it !!!!
ReplyDeleteand nice script too... plus u are funny..he..he..he...
Have a Ho ho ho Christmas.
xoxo,
B.
Darcy,
ReplyDeleteSo cute. When I was reading your email there were no pics and I really got a kick out of how you said everything. Thanks for the humor. I needed it and your ornaments are lovely.
These are so pretty! I really love them. New follower here. Would love it if you would stop by and share this at my linky party going on right now :) http://everything-underthemoon.blogspot.com/2011/12/bedazzle-me-monday-11.html
ReplyDeleteHave a great week!!
Wow! Love it!
ReplyDeleteThis is SO adorable!! Hoping you can link this up at my turquoise lovin' party going on right now!! (red during the holidays too) http://www.sweetlittlegals.com/2011/12/turquoise-lovin-16.html
ReplyDeleteLOVE! Gonna so copy this! Thanks for posting.
ReplyDeleteThose are beautiful. Love the silver against the bright colored backgrounds.
ReplyDeleteI have a giveaway going on right now WOuld love you to stop by and enter.
Jamie
http://diyhshp.blogspot.com/
So fun and festive!! I'd be thrilled if you'd join my party and show these pretties off!
ReplyDeletehttp://oneartmama.blogspot.com/2011/12/shine-on-fridays-5-and-some-fabulous.html
Nice! These are pretty sweet! I'm going nuts with Christmas ornaments and this is right up my alley!
ReplyDeleteLove the texture! These are gorgeous!
ReplyDeleteMiranda @
http://ohboyohjoy.blogspot.com/