I started by spray painting a bunch of frames white. I had them already, and they are kind of mismatched in style, but that's the way I like it. I like how the white unifies the entire situation. What I don't like is how, whenever I think about the word Situation, I think of Jersey Shore, and I've never even seen that show. It's bothersome, really.
Oh! Hey! Want to know how many holes are behind each and every frame in my house? I'm going to take a guess and say there are at least a good, solid, five holes behind each one. And, yes, I know how some people lay their pictures out on the floor first or do that paper taped to the wall thing so that they don't have five holes per frame. I envy those people. I am not those people.
I wanted to have some pieces of art that I would keep in the frames for a very long time and some that I could change out with the seasons. Which is a ridiculously lofty goal.
True story: When Peyton and Ella were very, very little I framed two pieces of their artwork for each of their rooms. "How cute this will be!" I thought. They will be glorious, fresh, mini art displays! I will switch out the old art as they make new art and it will all just be so lovely and I will be the best, most decoratively-saavy mom ever. Is that even a THING? It doesn't matter, because do you know how many times I switched out their artwork? In a two year period? Zero.
Anyway! So, the two big orange leaves will be switched out (HA!), as will the little Halloween pictures in the big white frame (HA! HA!). It should be a Smart-Bottom Enterprises drinking game. Every time that crazy-ass crack-head Darcy thinks she can ever ever ever stay on top of things, we all drink! Wish me luck. And, yes, I KNOW it's already the end of November and mini pumpkins and ghosts and witches probably belong in October. I'M WORKING ON IT.

The only things up there that are not made by my kids are the silhouettes. Ella's teacher made the one of Ella last year. Can you imagine cutting out 30+ of these suckers for an entire kindergarten class? I could barely do ONE.

Anyway, I loved Ella's so much that I made the one for Peyton. It took me three tries, and by the time I was finished I was seeing rainbowed unicorns jumping across my living room, but it was totally worth it.
There are lots of great silhouette tutorials out there, but here's what I did:
I took a picture of Peyton standing sideways.
Then I contrasted it as much as I could on my computer and printed it out in black and white.
I cut that out with an X-Acto knife, then I put it on top of black card stock to use as a template.
I cut out the black card stock with the X-Acto knife.
Then I backed it with white paper and then with Peyton's favorite color, blue. I backed Ella's with purple, because that's her favorite.
The burlap looking stuff behind the silhouettes is actually paper. Cool, right?

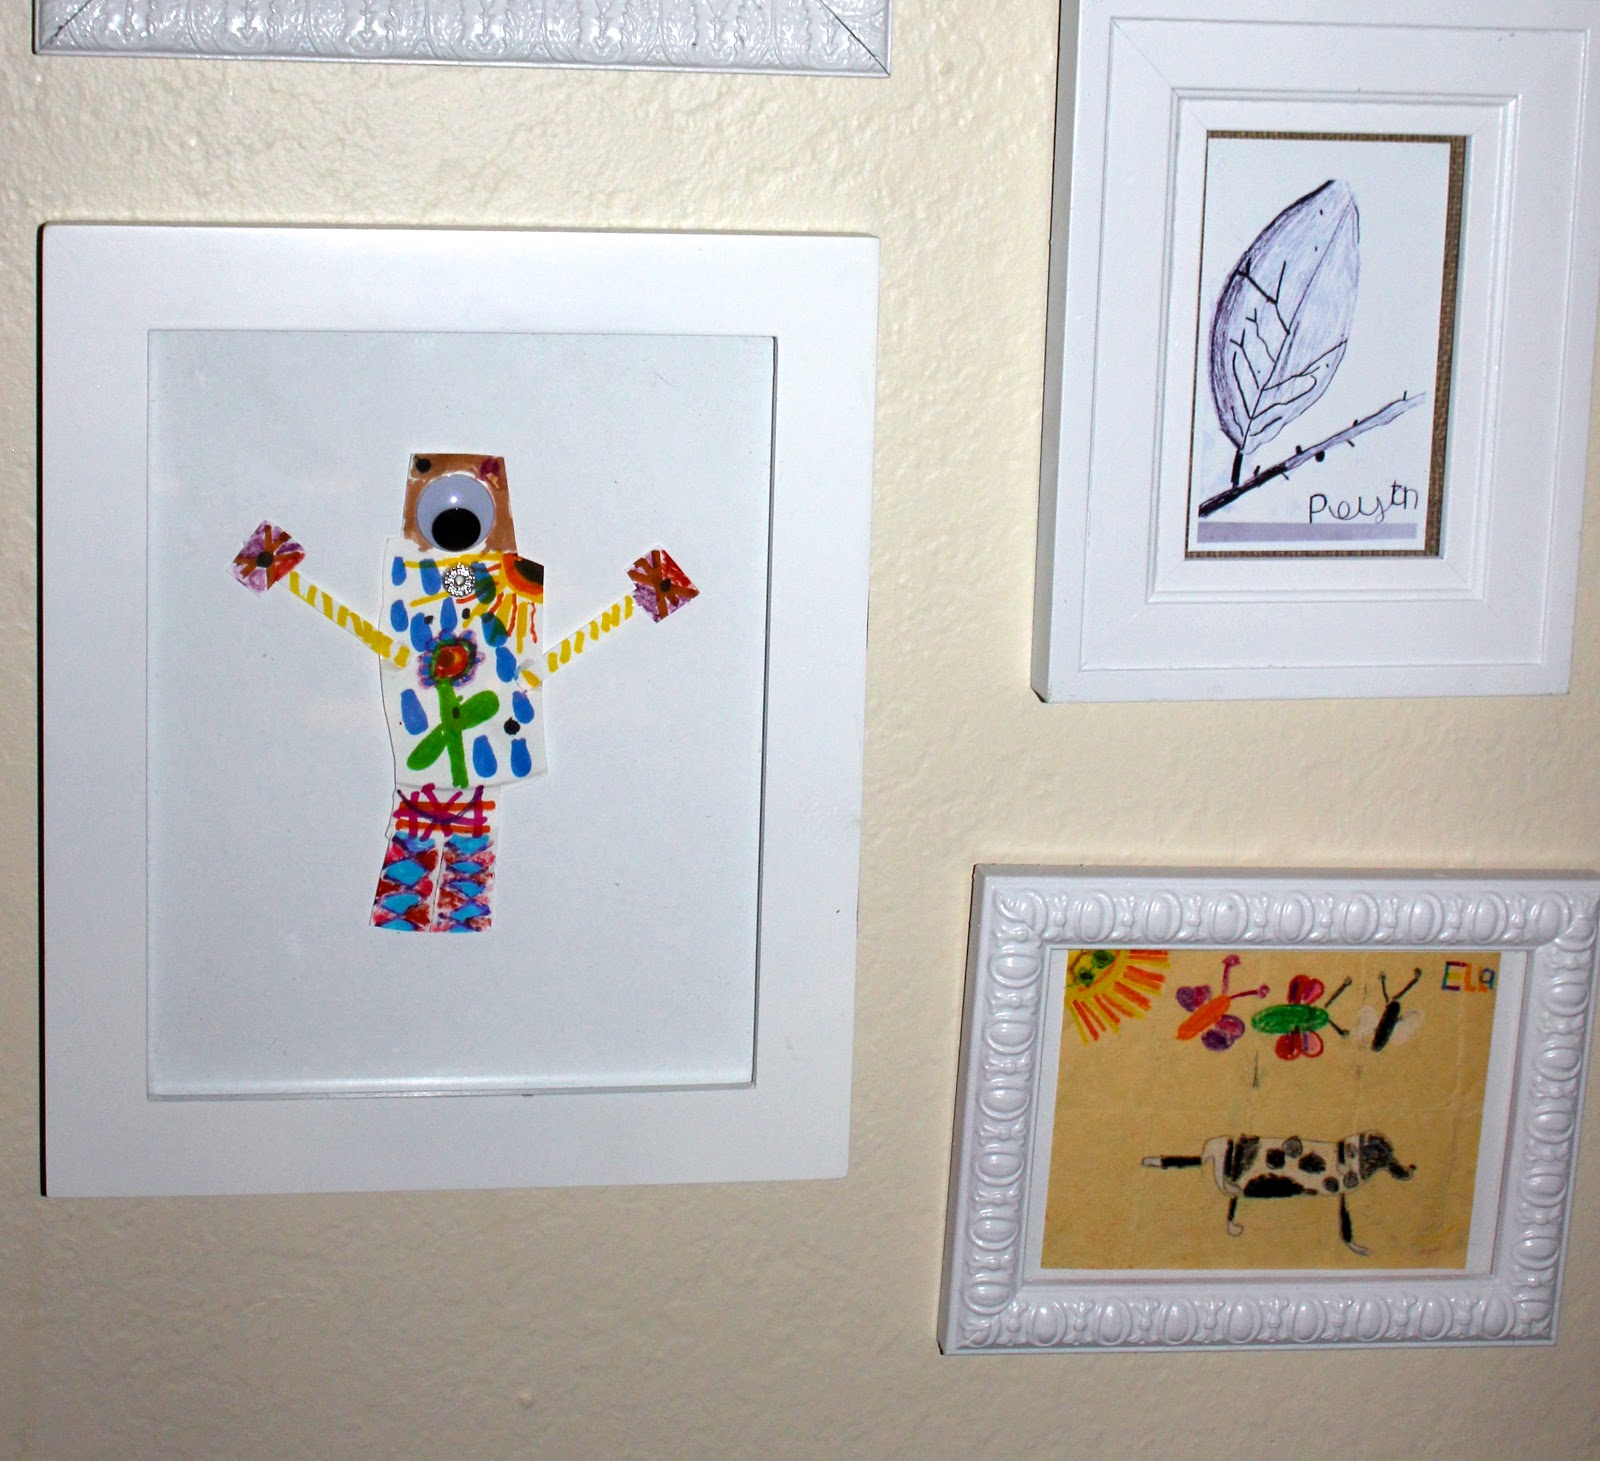
Some of the art pieces were already on perfect pieces of paper, like Ella's portrait of Penny down there (and Peyton's rocket and surfboards drawing). Other things, like Ella's robot (and the big orange leaves) were already cut out, so I stuck them on white card stock. And Ella's painting of our family on the swings (it says 2021 because she was trying to date it 2012), she painted especially for this art wall on a canvas I already had.
When I was taking out the glass to spray paint all the frames white, the glass on the largest frame broke. Or, rather, the little clips in the back (that hold the glass in place) were really hard to bend, and I was getting irritated, so thought that maybe I could just wiggle the glass out. Hey! Guess what? I couldn't.
So, I hung some jute twine across the back and taped it in place with blue painter's tape. Then I hot glued on some burlap (the real kind this time, not paper). Then I clipped on little, tiny clothespins, thinking it would be easier to switch out art this way. (DRINK!)
What's that? Are you noticing the pretty gold ribbon that I painstakingly glued to the inside of the frame? Because I'm so into detail? Are you also noticing that I didn't take the time to iron the folds out of the burlap? Because sometimes I'm not so into detail? Yeah, that also happened.

These little art pieces, as well as the small black and white house and leaf, were originally much, much larger. That little pumpkin on the left started off a good 18" high. I took pictures of the originals and printed them up small enough to fit where I wanted them. Easy!

I cannot tell you how happy this wall makes me. I LOVE how bright and colorful it is. I LOVE seeing my babies' artwork every day. And I LOVE seeing their sweet, sweet silhouettes.

Art wall!
(and....DRINK!)