
Teaching taught me a zillion bazillion things, one of which is that kids love clipboards. It's a fact. We didn't use them every day, but man oh man, when we did - happy students! And we're not even talking about fancy clipboards. Nope. Just plain, old, boring, cut-off-your-finger if you clip it by accident, survival of the fittest kind.
Like this:

So I decided to make some clipboards for the kids in our family for Easter. The kind that are a little less dangerous are also much more expensive, soooo.... It's back to the survival of the fittest kind. Because I'm cheap. So let's hope our kids are of the fittest group.
Anyway - super easy! I painted just the outside edge of each clipboard, front and back, in each child's favorite color. I didn't want much of the standard clipboard color to show and the clipboards are a little bit taller than the 12 x 12 inch paper I had picked out.

Then I Mod Podged on the scrapbook papers that I had cut to size. Peyton and Ella wanted to decorate theirs with marker first, so you might see some extra fancy artwork on a couple of the clipboards in the next few pictures. Peyton decorated the back of his with all of our names written in his version of cursive. Adorable. Ella decorated the front of hers with our names and then wrote I LOVE PENNY all over it.
You may also want to make a template if you want your paper to fit well. But don't take that one single template too seriously. You may need to make several. Because those clips at the top aren't necessarily in the same place on each clipboard. Stupid clips.
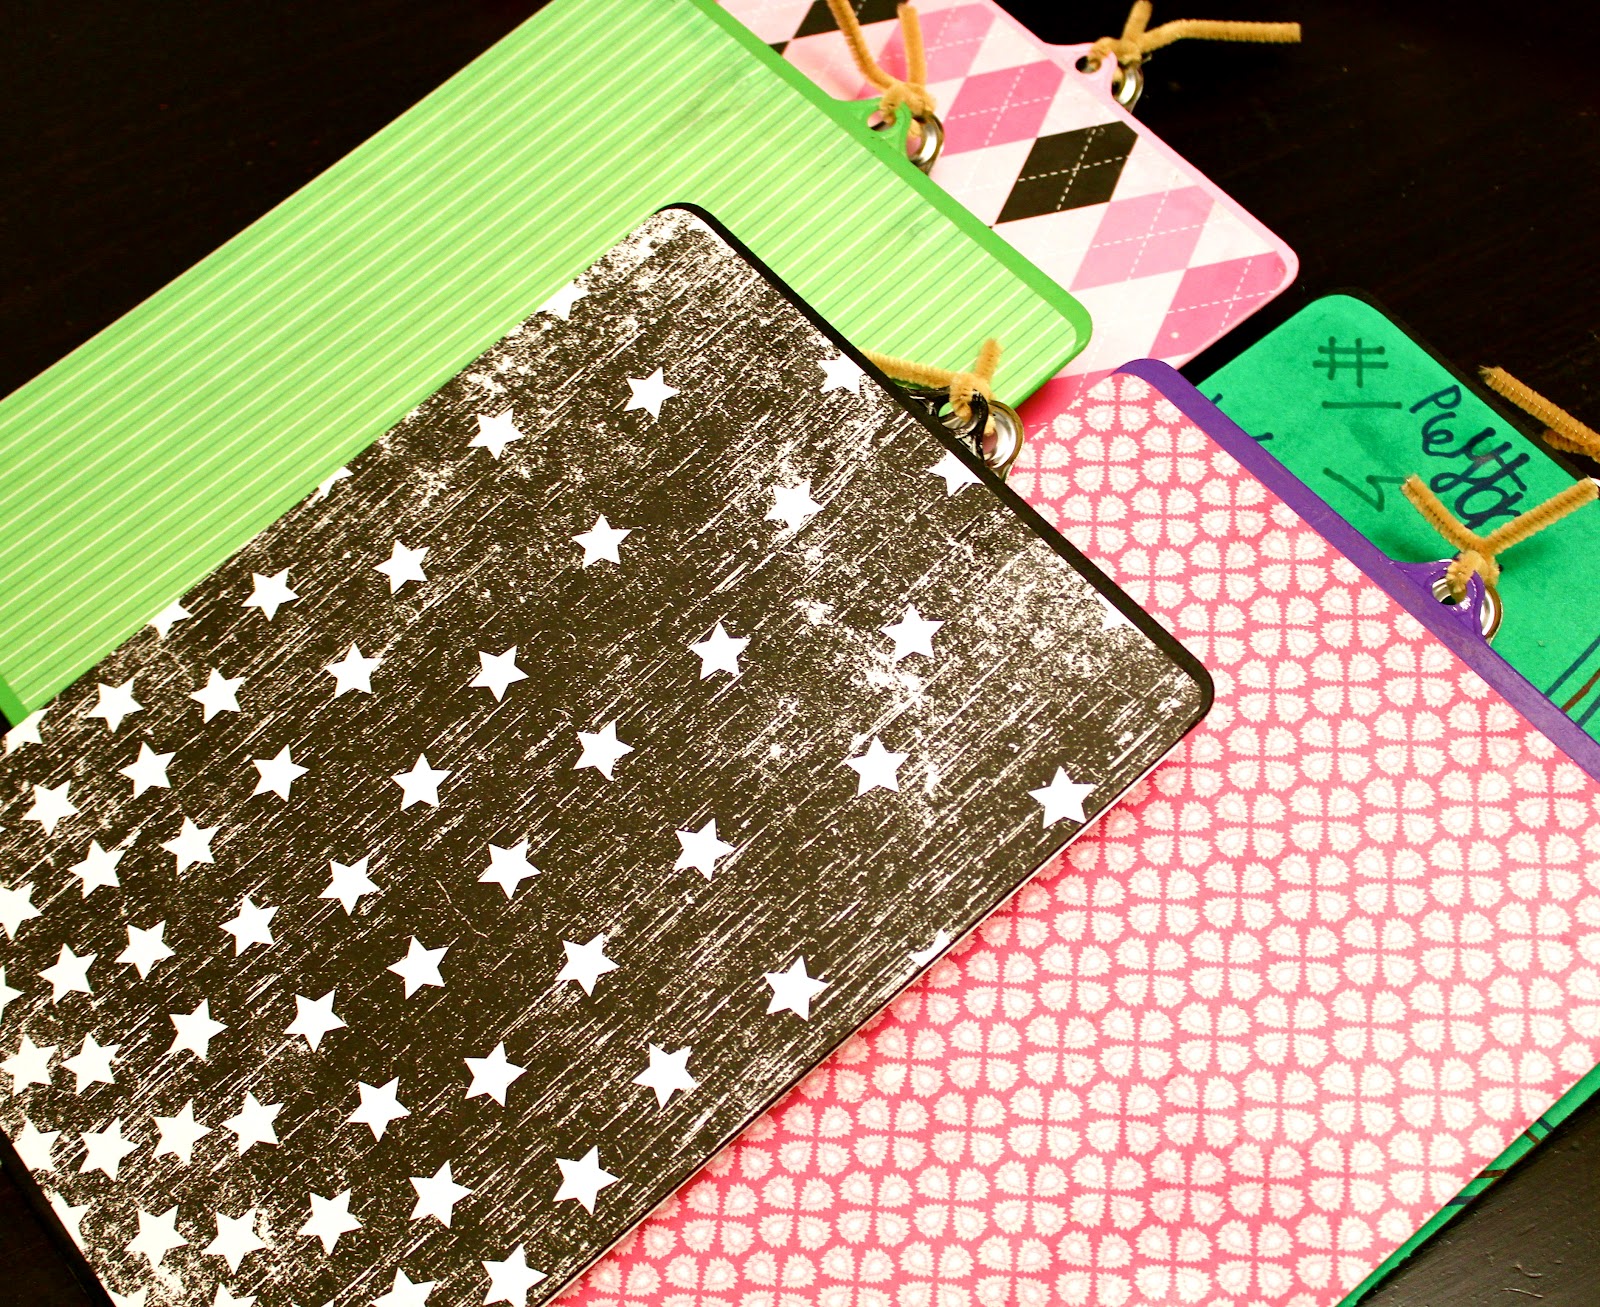
I made one single template, traced all the paper, cut all the paper, began to Mod Podge the paper onto the clipboards, and then! What the What!?! Why is this piece hanging off the clipboard by 1/2 an inch when the others fit perfectly? Cue profanities. I had to recut the piece - see the top left clipboard - so it would fit. It still looks good - maybe even better than the others - but it's the principal of the matter! They should all be the same!

You will need to find a way to keep the clip open while the Mod Podge dries. I cut in half and twisted up some chenille stems that I had lying around. They worked perfectly. (I took all of these pictures when the Mod Podge was still drying, so if the paper looks a little weird toward the top, that's why.)

Ella and Peyton chose their own letter stickers...

But I got to be the boss of the others.
And we have one little cousin who isn't in school yet. Since she has yet to learn how to NOT cut off her fingers by using a clipboard, I layered 5 or 6 pieces of pink adhesive-backed felt on hers to protect her sweet little fingers. Just in case.

You know what else would have been nice? Spraying each one with a clear glossy finish to protect it. You know what didn't get done because I ran out of time? Spraying each one with a clear glossy finish to protect it.
But! I did clip some Easter mazes and word searches and little pencil pouches stuffed with Easter pencils and cute erasers and little toys and candy.

Success! My kids use them in their room, on the table, on the floor, in the car and as a MAJOR BONUS, they still have all their fingers intact and it's already been two days!

13 comments:
Awesome job! How did you get your scrap book paper to fit so well on the front? Did you remove the "clip"
Those is adorable, what a fun idea! I would love for you to share it at my new party which will be open this evening- "Pin It and Win It Wednesday" @ www.cheapcraftymama.com!
These were like the best gifts EVER! My kids love them (Noah especially). Thanks auntie!!!
Super Super Super cute! This makes me want to find a use for a clipboard and make a few for myself! So cute, great job on being creative and using clipboards for organization!
I would love for you to stop by and link these up at our Naturally-Nifty party, since these clipboards are so "nifty" :-)
-Your newest follower
Hi 4you-withlove!
I didn't remove the clip - I just used a piece of paper and kind of traced around the clip the best I could. Then I ended up doing some cutting and taping to make the template as close as possible to the shape of the clip.
Hope this helps!
There is nothing better than dressing up something a bit drab. I love your idea and I think I will make one for myself. :-)
What a fantastic personalized project...love this idea! I'm so glad I found you via Fingerprints on the Fridge. I'm now your newest follower. I would love if you stopped by, Lori
It is a great idea to refresh the old clipboards. Lovely!
Wish you a great weekend,
Hanni
I use clipboards all the time and this would make them look so much nicer than the plain ones I am currently using! I would love it if you would link up to my party at http://www.claimingourspace.com/2012/04/tout-it-tuesday-2.html
Bet the kids loved these. I've been wanting to do some for a while... I think your post might have been the kick that I need to get it to happen!
This is such a clever idea. I would love for you to link up to my Linky Party via: http://ourdelightfulhome.blogspot.com/2012/04/live-linky-party-10.html
Mrs. Delightful
www.ourdelightfulhome.blogspot.com
Absolutely adorable. Love the personalization each of them :)
Thanks so much for sharing on Tout It Tuesday.
Post a Comment